

EnePick |
 |
|
| PURPOSE EnePick is effective when teaching the followings [energy conversion between light and electricity] [efficiency of energy conversion] [electric circuit] |
|
| TARGET Elementary school students (4th, 6th Grade) Junior high school Students (8th, 9th Grade) |
|
| CATEGORY Physics, Monozukuri(Science craft) |
|
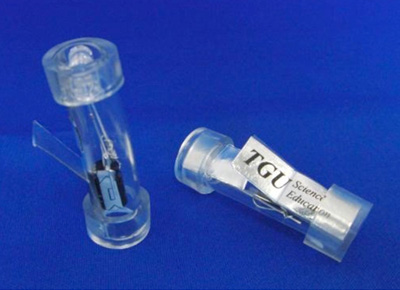
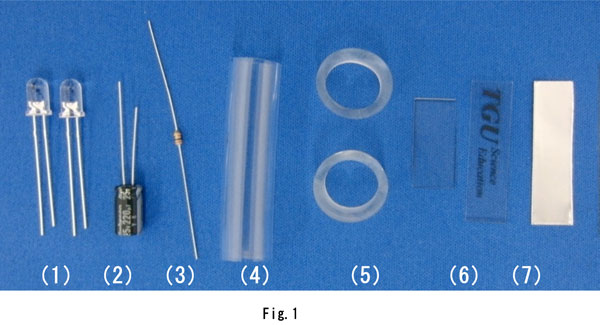
| HOW TO MAKE All parts are shown in Fig.1. (1) Red LED (OptoSupply, OSHR5111A) ... 2 (2) Capacitor (220 μF, 16V) ... 1 (3) Resistor (2kΩ, 1/6W) ... 1 (4) Vinyl tube (Outer diameter: 12mm, Inner diameter:10mm, length:45mm) ...1 piece (5) Toalon tube (Outer diameter: 16mm, Inner diameter:12mm, length:8mm) ...2 pieces (6) OHP film (35 X 10 mm ) ...1 (7) OHP film (20 X 10 mm ) ...1 (8) Aluminum tape (35 X 10 mm ) ...2 |
|
 |
|
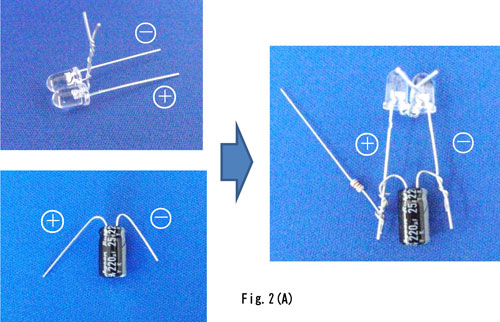
| (Circuit) The parts are assembled as shown in Fig.2(A). The circuit diagram is shown in Fig.2(B). Store the (circuit and switch) in a Vinyl tube as shown in Fig.3. |
|
 |
|
 |
|
 |
|
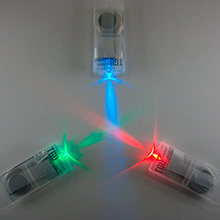
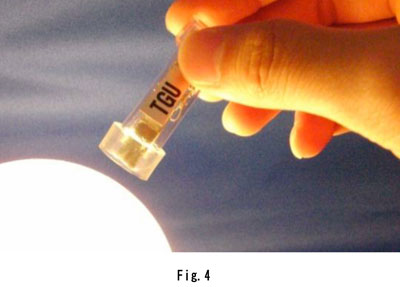
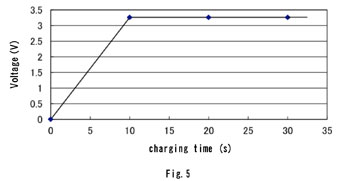
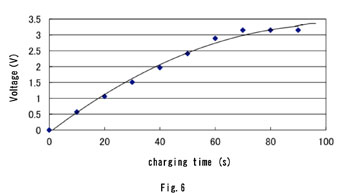
| HOW TO USE Charging: Direct the LEDs of EnePick to the light source as shown in Fig.4. The 2 LEDs are connected in series, And, The terminal voltage of the condenser is 3.5V. When a LC projector is used as a light source, it will take 10seconds to charge the condenser. (cf. Fig.5) When the sun is used as a light source, it will take 1 or 2 minutes to charge the condenser.(cf. Fig.6) |
|
 |
  |
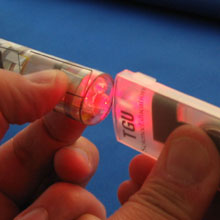
| Discharging: Push the switch. One of the two LEDs is connected to the condenser. (cf. Fig.2(B)) One LED emits light for several seconds as shown in Fig.7. |
|
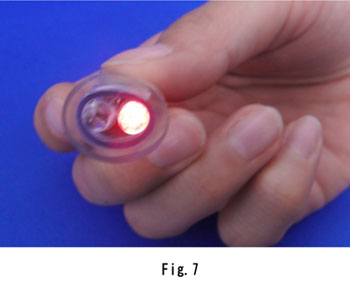 |
| There is large difference between charging time and discharging time. It helps students to recognize the energy loss during energy conversion processes. |
|
|
| REFERENCES M.Watanabe and M.Kamata, "A Tool for Helping Students to Realize Energy Conversion between Light and Electricity", Jouornal of the Physics Education Society of Japan, Vol. 59, pp.9-13 (2011) (written in Japanese) |
| Masahiro Kamata and Yuna Tamamura,"Tiny tool converts light to electricity", PHYSICS EDUCATION, 45, 224-226 (2010) |